In this article, I will set up a GUI environment from AWS EC2 services AMI Linux Images which is Deafut as CLI.
Let's go through each step to find the way to launch in GUI mode.
Requirements and Process:
- AWS Account
- MATE desktop environment
- Any VNC Services (TigerVNC)
- Tiger VNC Client Software On your Host Windows OS
- For a Better hands-on, Use Putty as a Remote login via SSH to access the Linux
Here, I have Guided you with the Steps to be followed,
Step 1:
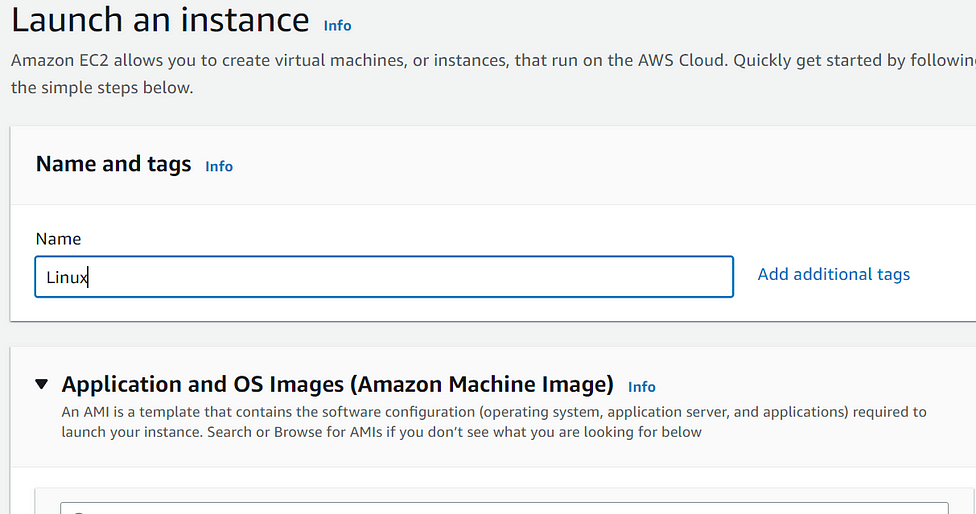
Go to your EC2 services in the Amazon management console AWS, using the search bar, and then click on the instance in the right corner.
Launch an instance with the Configuration of AWS

Step 2:
Select Linux CLI-based AMI image from the catalog, Here we need
If you have already launched an Instance and want to proceed with manual GUI installation, then do the following:
- Install the MATE desktop environment, a lightweight GUI based on GNOME 2 available as an extra for Amazon Linux 2
- Install the MATE desktop environment manually.
- Install a VNC service like TigerVNC. To download Check Out the tigervnc.org website.
- Connect to the GUI using the VNC.
Here we use the Pre-Setup configured MATE desktop environment.

Step 3: Create a Key Pair and Select the Instance Type of any

Step 4: Launch the Instance.

Step 5: To connect the instance go to the EC2 dashboard, Select Connect and here I will use Putty as SSH remote login to the Instance. Get the SSH CLIENT LINK.

Step 6: Now open Putty software and connect with your amazon instance by following the steps
- Open putty, Enter your instance Public IP in the Hostname and connection type SSH type.
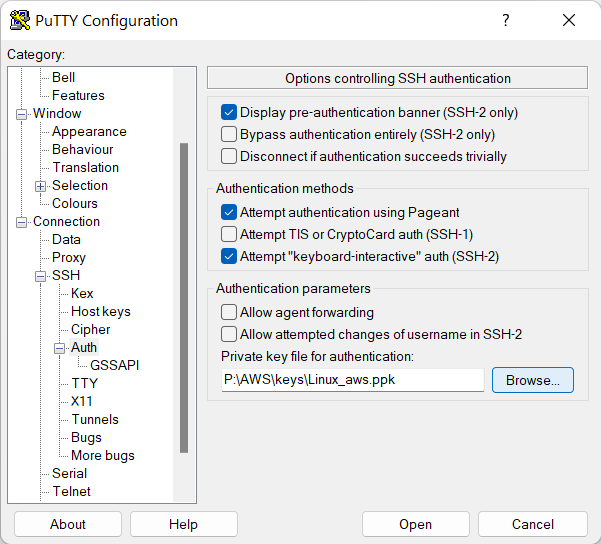
- Now go to Connection > SSH > Auth > Credentials.
Upload your ppk file, which we have downloaded from Amazon in Step-3. - Select Open.


Step 7: Now, Connect to EC2, and Now CLI is given to perform tasks on Amazon Linux 2 AMI
#grep PRETTY_NAME /etc/os-release
sudo yum updatesThis is to Update the Sofware programs as a whole.


The Packages are updated.
Step 8: Now Install the MATE Desktop Environment
sudo amazon-linux-extras install mate-desktop1.x
Step 9: To make MATE as Default Desktop for all users present.
sudo bash -c ‘echo PREFERRED=/usr/bin/mate-session > /etc/sysconfig/desktop’
Step 10: Install the TigerVNC Server Package
sudo yum install tigervnc-server
Configure a VNC-specific password, then limit VNC network access to the local host, so that VNC can only be accessed via a secure SSH tunnel.
Then, create a mandatory configuration file that includes the localhost option.
Create the tigerVNC configuration directory
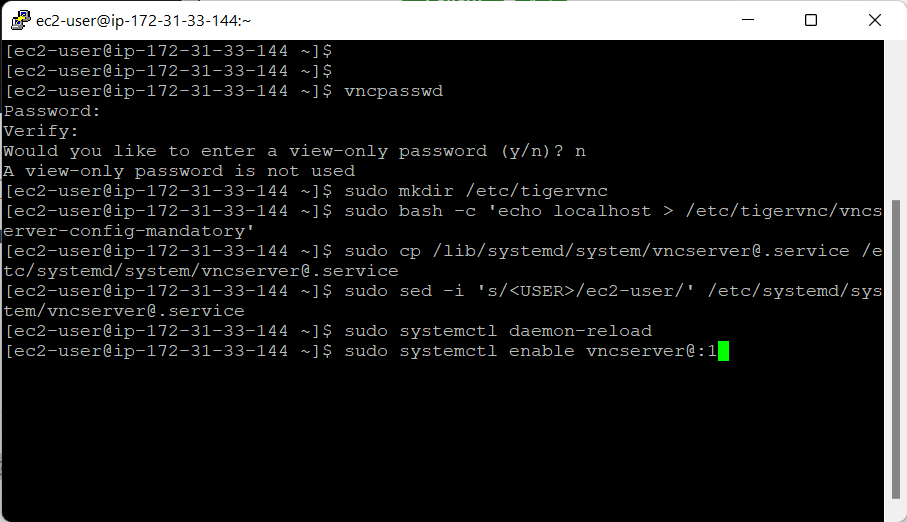
vncpasswd
sudo mkdir /etc/tigervnc
sudo bash -c 'echo localhost > /etc/tigervnc/vncserver-config-mandatory'
Step 11: Start the VNC Server on display number 1, and cause it to always start at boot time. Create a new systemd unit.
sudo cp /lib/systemd/system/vncserver@.service /etc/systemd/system/vncserver@.service
Replace all occurrences of USER in the new unit with ec2-user using the sed command. Reload the systemd manager configuration after that.
Start the service.
sudo sed -i 's/<USER>/ec2-user/' /etc/systemd/system/vncserver@.service
sudo systemctl daemon-reload
sudo systemctl enable vncserver@:1
Step12: Install the Client tigerVNC software package
- Enter your Instance public IP in the Hostname and “connection type” SSH type.
- Now go to Connection > SSH > Tunnel
- In Source port, Add 5091 and Destination- “ localhost:5091” then click on add.

Click on Open.
Now Start the service with the following command —
sudo systemctl start vncserver@:1
sudo systemctl status vncserver@:1
sudo systemctl enable vncserver@:1 
Now, When Going to the tigerVNC client which,asks for the VNC server hostname, enter “localhost:1” and then click on connect button.
Enter the VNC password that you set up previously.
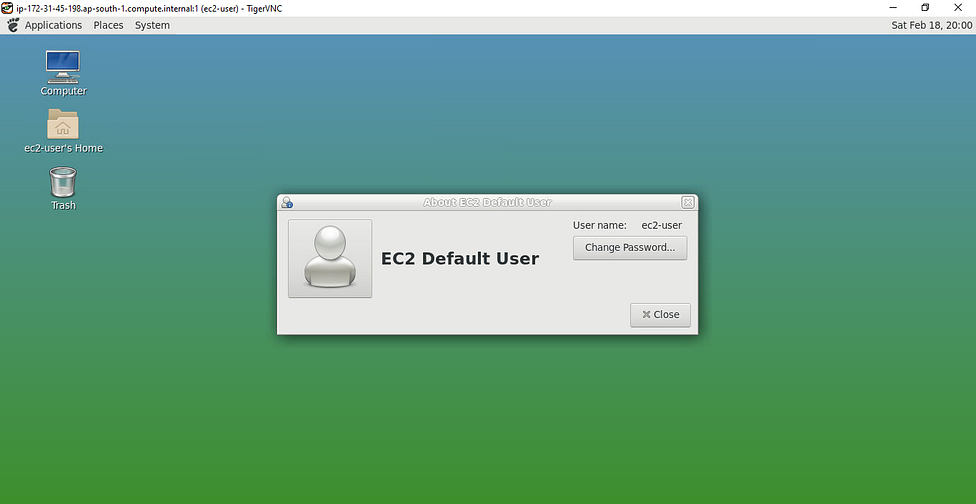
Here is your GUI running on the Amazon Linux2 image.


Thank you !!


